Emailing a Group of Customers Using re:Members AMS Email
For clients not using an email marketing service such as Informz or MailChimp, re:Members AMS allows groups of customers to be emailed. The email system offers the essential capability to email contacts and is not as full featured as an integrated email marketing service.
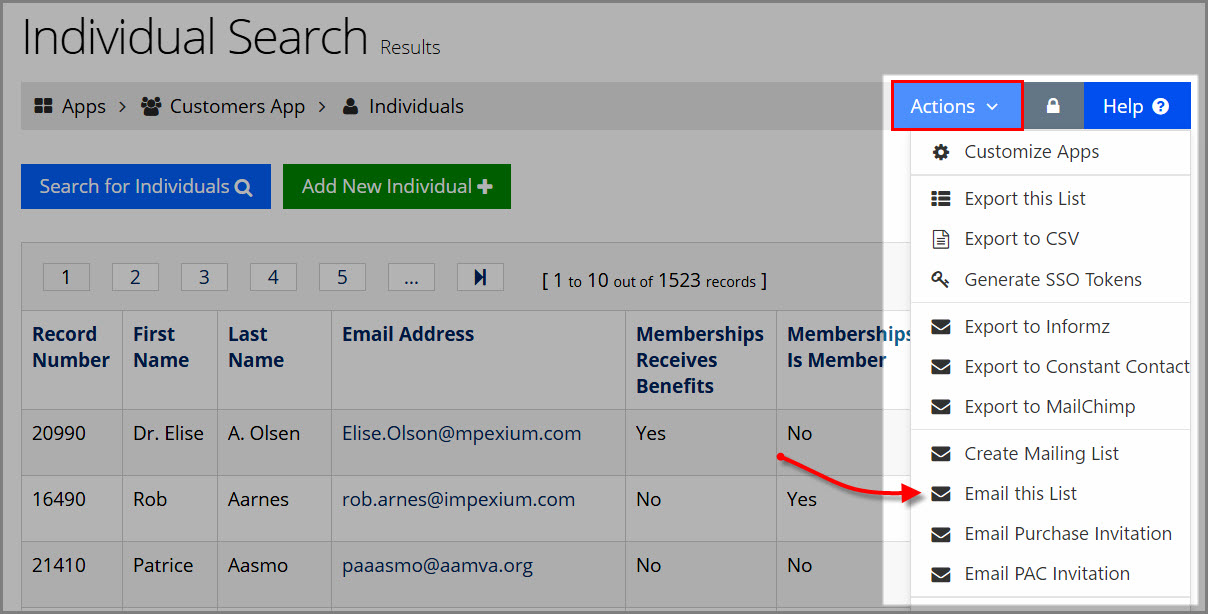
Using the re:Members AMS email system:
- Run a query pulling the list of customers to be emailed.
- On the query results page, click the Actions drop-down.
- Click Email this List. The email creation form will appear.
- Create a name for this email group in the Name field. If you wish, create a description.
- Create an Email Subject.
- Begin typing the body of the email in the Template Body HTML editor. To refer directly to customer information in the query result set, select the query field to include from the Query Fields drop-down.
- Once the email is complete, click the Send Preview Email button to send a preview email to yourself.
- Once the email has been reviewed, click the Send Email button to send the email to all customers in the query result set with a valid email address.
Instances in which an email is sent in this way appear in the My Profile of the sender, under the Tasks tab, Scheduled Jobs. Click the View button next to the Email Group List job.
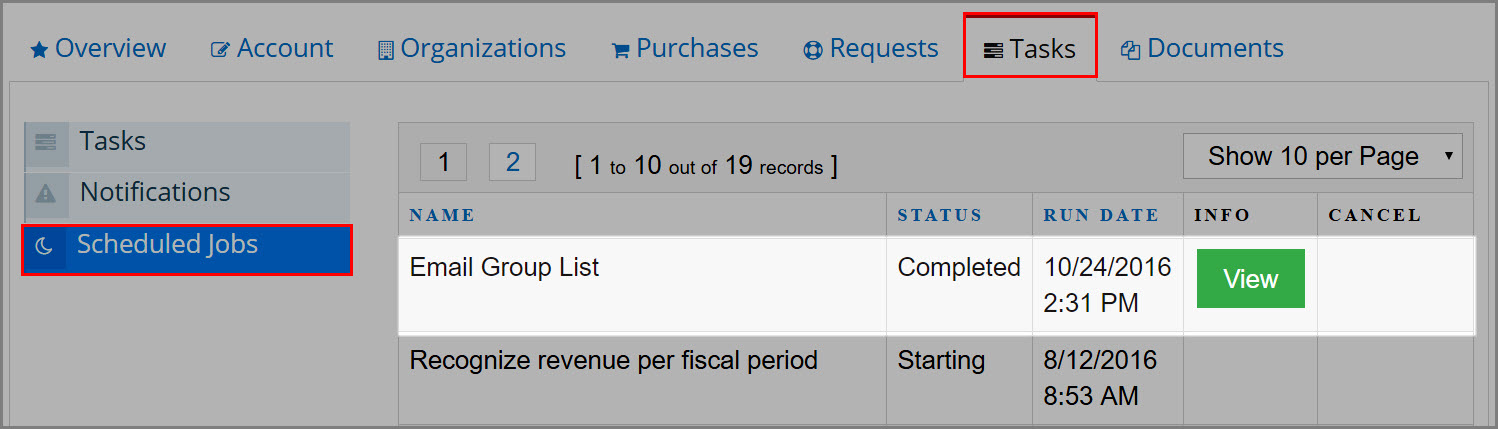
This opens the Email Results page, which displays the customers to whom the email was successfully sent. If a customer in the list did not have an email address when the group was originally emailed, an email can be added from this page and the email re-sent to that customer.
Emailing an Event or Membership Invitation
Staff with the necessary permissions enabled can use system email functionality to send an event or membership invitation and, in the case of event invites, to preserve a record of those email invites on the Event Record. If you prefer, emails can still be sent using the integrated eMarketing system (such as Informz or MailChimp) used by your organization, though the history of these emails is not tracked on the Event Record.
Note: The processes described in this article are for system email functionality only, and do not apply to integrations with outside eMarketing systems.
To email using system email:
- Run a query pulling a list of customer records.
- On the query results page, click the Actions drop-down.
- Click Email Purchase Invitation. The email creation form will appear.
- Create a name for this email group in the Name field. If you wish, create a description for the group being emailed in the Description text box.
- In the Product Type drop-down field, select Event or Membership, as desired.
- In the Product drop-down, select the desired event or membership. Note that this selection controls how the email's sending history is logged. It does not impact the content of the email.
- Create an Email Subject.
- Type the body of the email in the Template Body HTML editor.
To refer directly to customer information in the query result set, you can enter the field name surrounded by double curly brackets. E.g.: {{FirstName}}. The Query Fields drop-down includes a list of all available customer fields, and gives the option to copy the formatted field name. - Once the email is complete, click the Send Preview Email button to send a preview email to yourself.
- Once the email has been reviewed, click the Send Email button to send the email to all customers in the query result set with a valid email address.
A history of these system mailings appears in the eMarketing App > Mailing Lists. Staff users can view the mailings they have personally scheduled via their My Profile, under the Tasks tab> Scheduled Jobs.
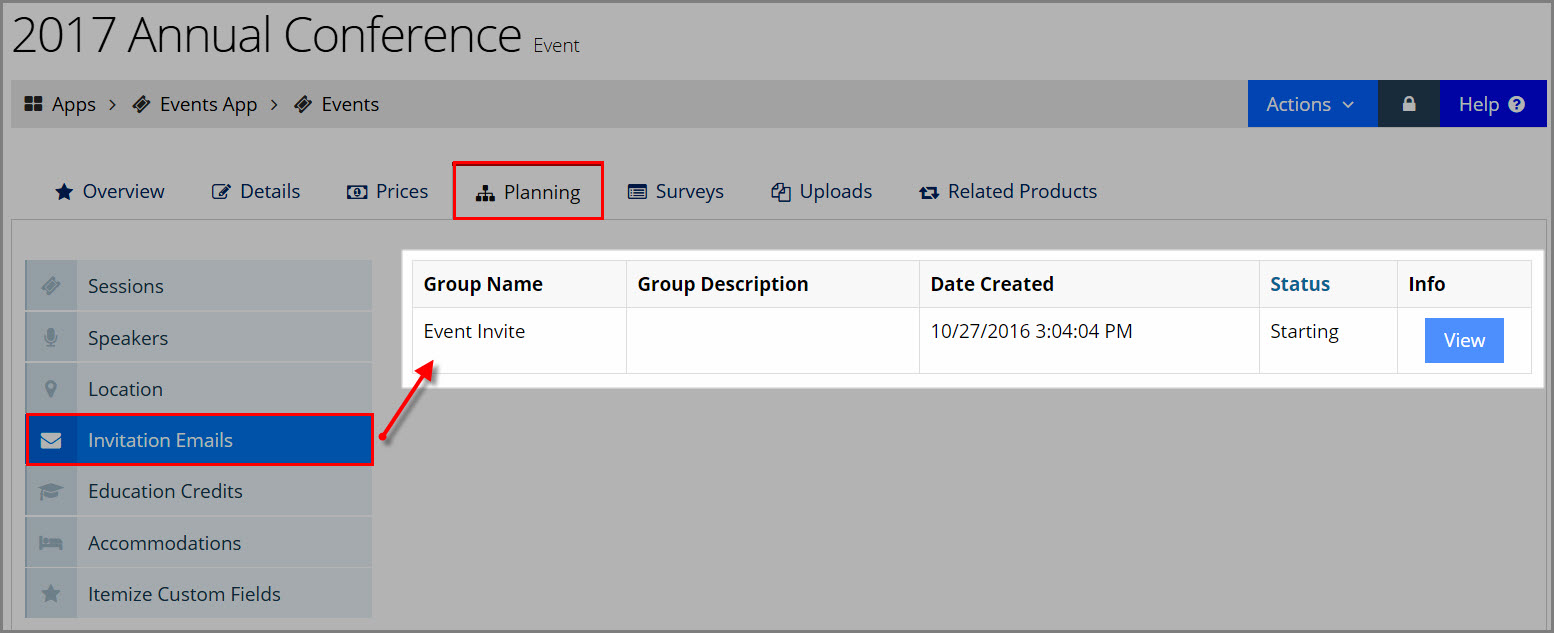
For events, a history of the event invitation email is also listed on the Event Record under the Planning Tab, Invitation Emails menu option.
Related Topics: